Benefit Enrollment
Follow your organization's policies to sign up for or reject benefit through online benefit enrollment. An open enrollment period is the most common time for this to be available. Organizations can also make online enrollment available for qualifying events and for employees who were recently hired or rehired.
Enrollment Steps
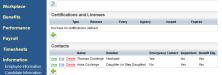
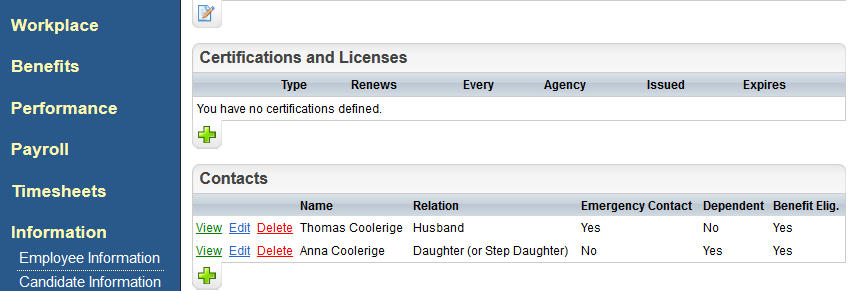
- Optionally, review and update your contact records first. From the Information menu, select Employee Information. Scroll to the Contacts section. View your list of contacts. For your contacts who are benefit eligible, you will need birth date information and will often need either Social Security number (or ITIN number) and gender information.
- To open a record and edit it, click on Edit.
- For your dependent child, mark the checkboxes for "Child Dependent" and "Benefit Eligible".
- For your spouse/domestic partner, mark the checkboxes for "Spouse/Domestic Partner" and "Benefit Eligible".
- For any of your contacts who may be a beneficiary, also mark the checkboxes for "Beneficiary" and "Benefit Eligible".
- To save changes, click on the
 Save icon, and to confirm that you want to save, click on OK.
Section
Relationship Types
Then, set up on the Employee Contacts Detail
Spouse
Spouse/Domestic Partner
- Select “Spouse/Domestic Partner”
- Select “Benefit Eligible” (when applicable)
Dependent
Dependent for Benefit Purposes (including a child up to age 26)
- Select “Child Dependent”
- Select “Benefit Eligible” (when applicable)
Beneficiary
All Beneficiaries (including those also listed in other sections)
- Select “Beneficiary”
- Select “Benefit Eligible” (when applicable)
- To open a record and edit it, click on Edit.
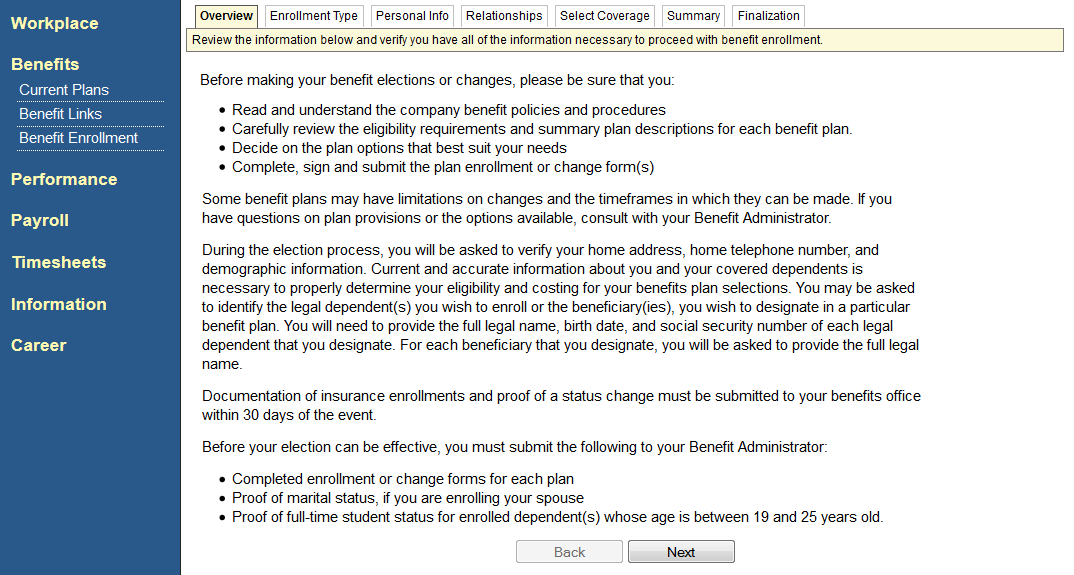
- From the Benefits menu, click on Benefit Enrollment.

- Overview. Read the overview, and click Next.
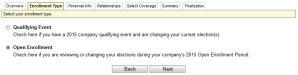
- Enrollment Type. Choose the enrollment type, and click Next.
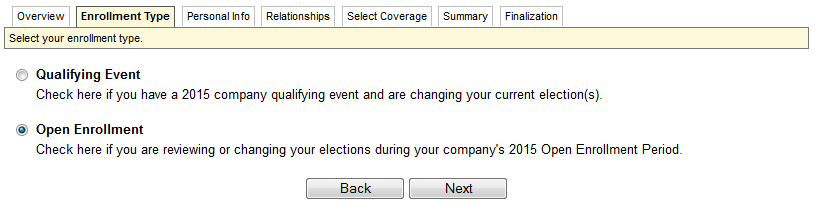
- Qualifying Event. After you choose the option for qualifying event, a list of events and a date field display. Click Next to continue.
- New Hire. If you were hired or rehired, choose a New Hire enrollment. Click Next to continue.
- Open Enrollment. If your organization is having a benefit open enrollment, choose the Open Enrollment option. Click Next to continue.
- Personal
Info. Verify, correct, or update your personal information. Click Next. If you made a change, you will be prompted to update your personal information. Click on OK.
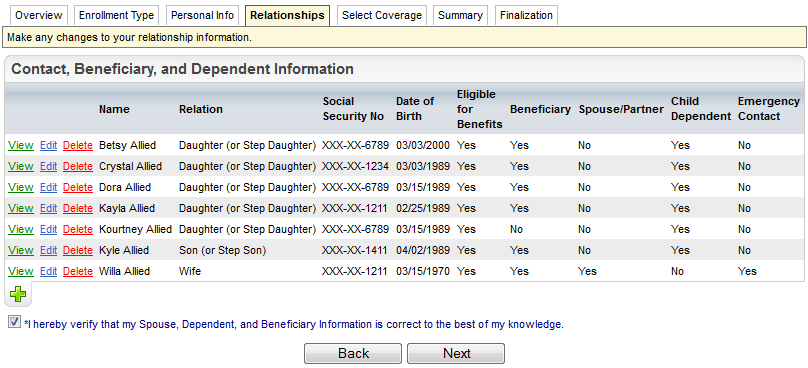
- Relationships.
Confirm which contacts are listed as your spouse, dependent child information, and beneficiary information. View and edit listed contacts as needed. To add a contact, use the plus icon, complete the required information and save. After you are finished defining this relationship information, select the checkmark for "*I hereby verify that my Spouse, Dependent, and Beneficiary Information is correct to the best of my knowledge." Click on Next.

- Select
Coverage. The listed plan types may vary depending on what types of plans are available
and eligible for online benefit enrollment.

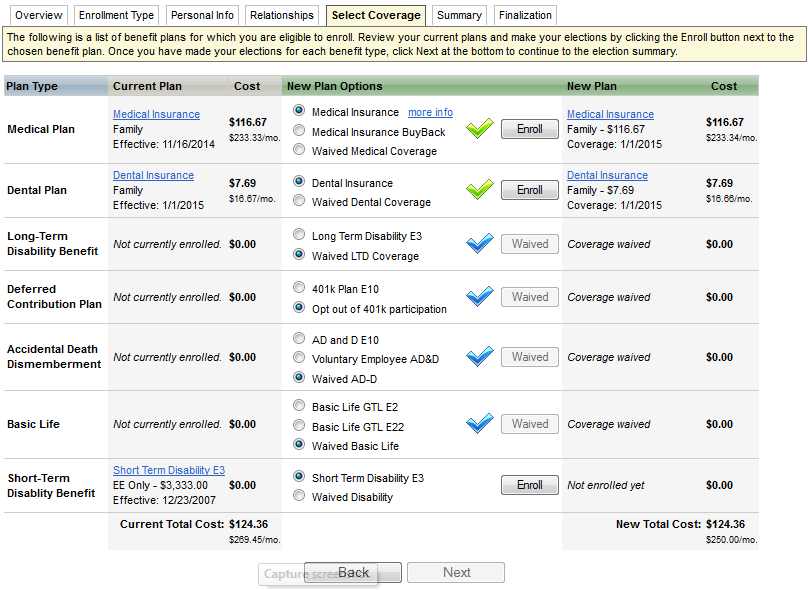
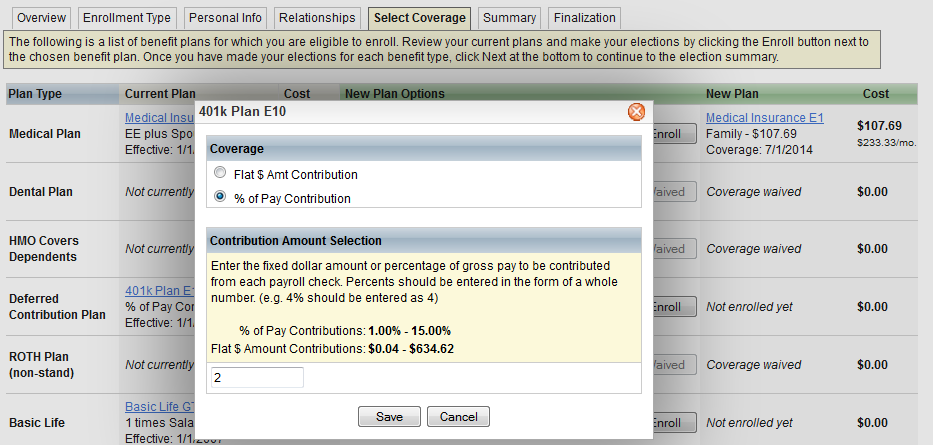
- Per plan type, enroll or waive coverage. If a qualifying event enrollment has checkboxes in an Update column on the left, mark the Update checkbox for the plan type first. If you would like to enroll in a plan, click on its option button, then its Enroll button. Review the estimated costs per pay period for each coverage, then select the Coverage option.
For a coverage that covers dependent child(ren) or a spouse/domestic partner, mark the checkboxes to extend coverage to your dependent(s) or the spouse/domestic partner. If there is a member info icon, optionally, click on it and define whether your contact is Medicare eligible or any HMO-related participant information required.
For a plan that covers beneficiaries, choose the coverage and define the percentage for each primary beneficiary. The total percentage needs to equal 100. Optionally, also define one or more alternate beneficiaries.
For a plan where you can opt a percentage of your pay or a flat dollar amount, select the coverage option and enter the corresponding amount or percentage. For instance, enter 2% as 2 without any percentage sign.
- Repeat for each plan type.
- Click Next.


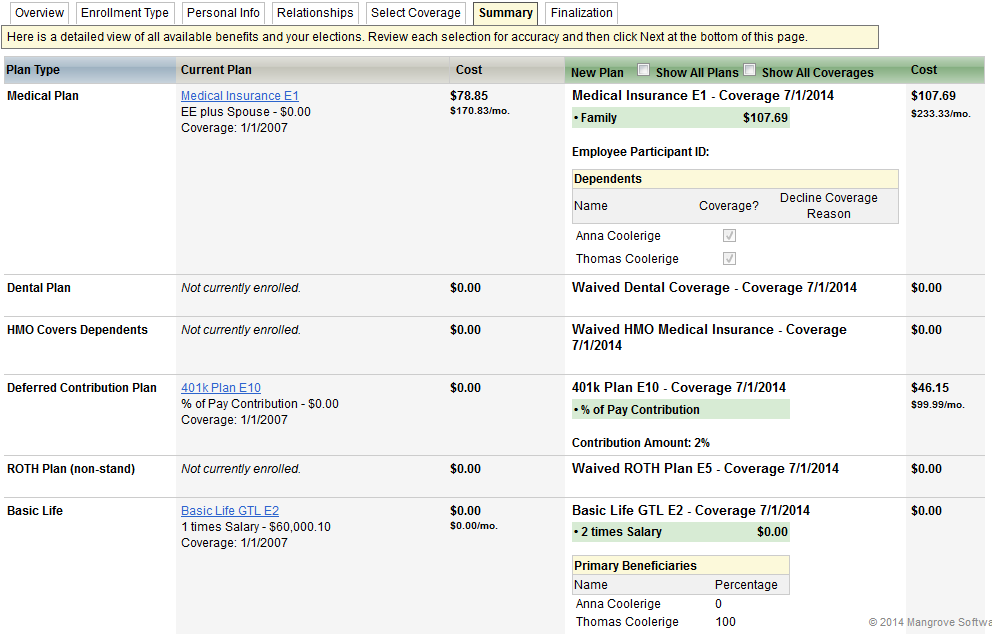
- Summary. Review
your selections compared to the other available options. (To return to
the coverage options, click Back.) If a plan is defined to require reasons for declining coverage and you have waived it for yourself, then select a reason you are declining coverage. If the coverage level that you selected typically would also cover some of your other contacts (based on how you defined those records) and if reasons to decline coverage are required, also select a "Decline Coverage Reason" as needed.

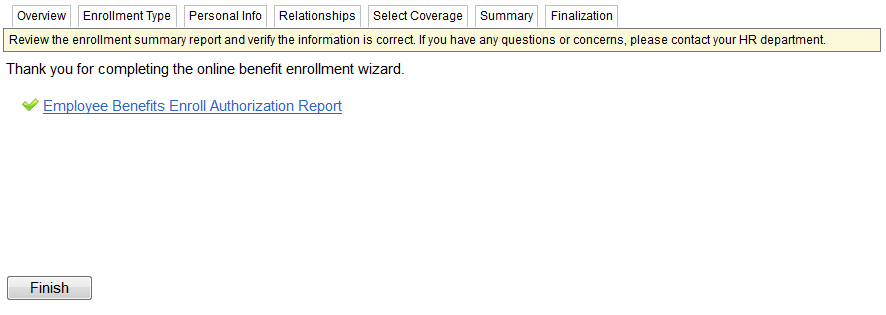
Click on Next. - Finalization.
Review
the summary of information and read the authorization information. To agree, select the checkbox. To sign, enter your first
then last name in the name field, and enter your system password in the
password field. Click on Finalize, and click OK in response to the prompt.

A report link displays. Based on your organization's policies, you may need to print a copy, sign it, and send it to your organization's HR or Benefits department.